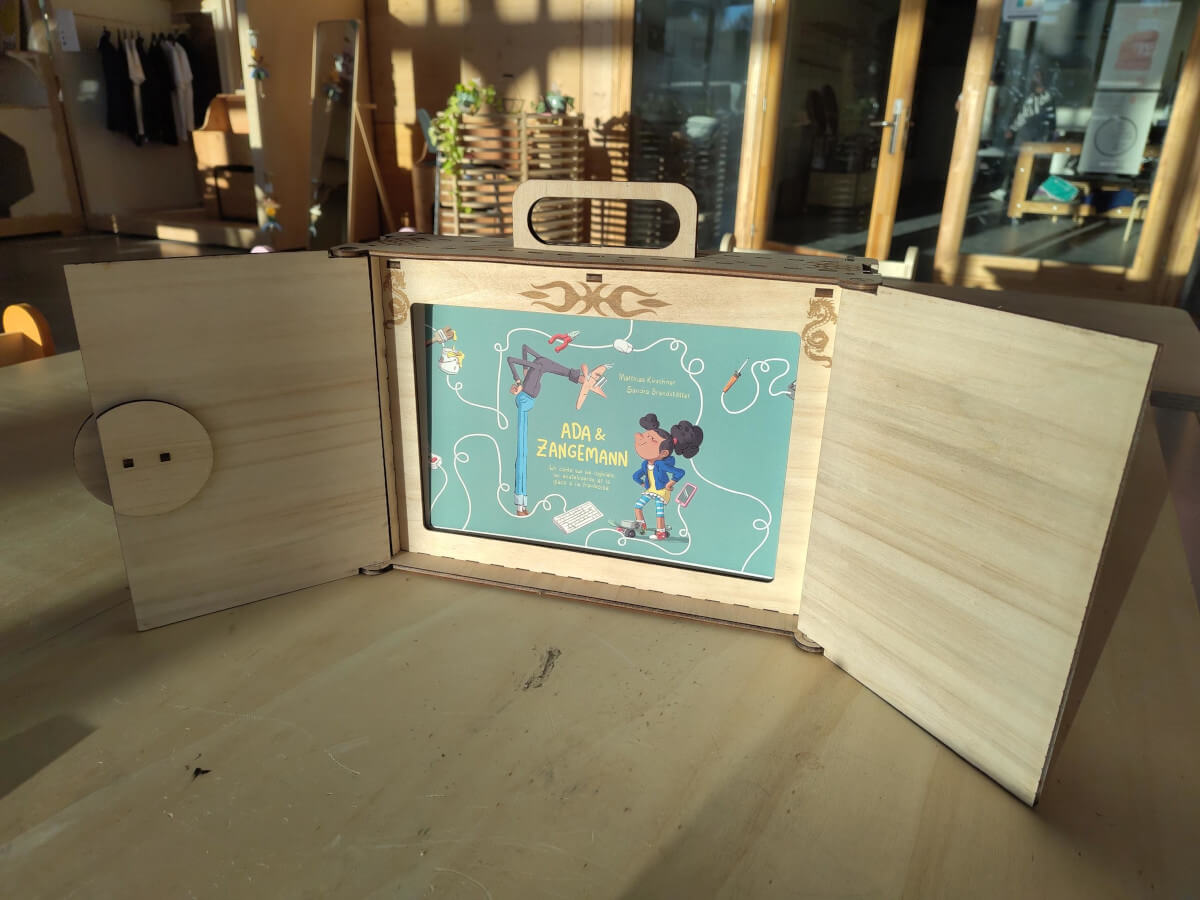
Kamishibai
Kamishibai butai (japanese image theatre)
This is a kamishibai butai (japanese image theatre), with several options for covering the different
holes when put away.
Magenta cuts should be performed before the blue cuts.
The recommended wood thickness is 5 mm at least, particularly if you go for big sizes (which works
fine with A4 or A3). If you use 3 mm, you should not use the screwing option (disabled by default),
so you can assemble your box with glue or force the pieces together (using a bigger burn parameter).
Please note that using the screwing option often means adding feet (which can be 3D printed for
example). It makes the box easier to mount and unmount for repairing purposes, and the feet protect
the wood from whatever surface the box is put on. Screws are not compatible with a small frame
thickness (i.e. with sheets with a small margin).
For assembling the box, please follow the following steps:
1. Assemble the front side and back side pieces to the front and back of the front and back panels
respectively
2. Assemble the top handle pieces together and insert two of the plates into the two holes (centered);
then insert the assembled handles into the dansle ceiling and add the two other plates
3. Insert the front and back panels into the bottom panel
4. Attach the handle between the top of the front and back panels, then add the top panel but do not
fasten it yet, just keep it loose on top
5. Assemble the locks together to the doors if enabled:
   5.1 lock with key : lock front - lock external - plate cut from the door (also add the door now) -
   lock internal
   5.2 lock simple : lock grip - lock external - plate cut from the door (also add the door now) -
   lock internal
   5.3 small extra locks for top and bottom : lock grip - plate cut from the door (also add the door
   now) - lock internal - lock spacer - lock locker
6. Add the hinges to the doors if needed (for two-panes front doors)
7. fasten the top
8. Attach two side panel inner plates to a side panel with the two pegs (use glue if necessary) and
repeat a second time
9. If you use a lock with key, add the last short peg to the back plate (you may want to sand it a bit
on the other half so that the key can be attached easily enough, but it should not fal off either)
10. You should now be able to close and open all the doors
Usage recommendations:
1. Add your paper sheets from one side or the other (normally you leave either left or right closed,
depending on which is more comfortable for you)
2. Thick paper is easier to handle ; if you print on a home printer, use the thickest you printer can
print (probably around 200 grams per square meter) ; if you want extra quality, go to a printing shop
and ask them for 300 grams per square meter printing
3. You can also buy virgin drawing paper to write your own stories
4. If you decided to go for the lock with key, you can ask one of the participants to unlock the box,
it really helps in immersing into toe story
5. If you need a kamishibai for showing images during a guided tour, you may choose to use the
one-panel front, and use transparent acrylic for the back and front panels to keep you sheets
protected from light rain ; you may need to cut the box from a rain-resistant material
(outside-compatible plywood or acrylic)

